Instructions for Side by Side Printing
- Print the notecards
- Fold each page in half along the solid vertical line
- Cut out the notecards by cutting along each horizontal dotted line
- Optional: Glue, tape or staple the ends of each notecard together
Fluorescein Patterns - RGP Lenses
front 1 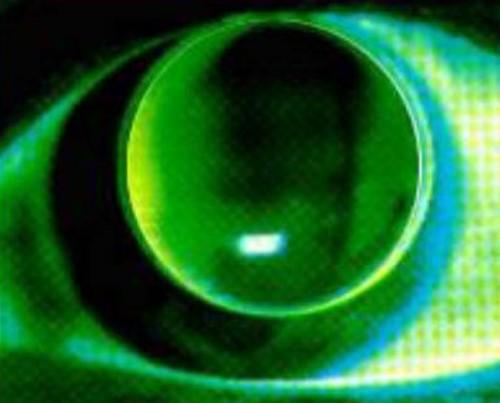 | back 1 Against the Rule Astigmatism
|
front 2 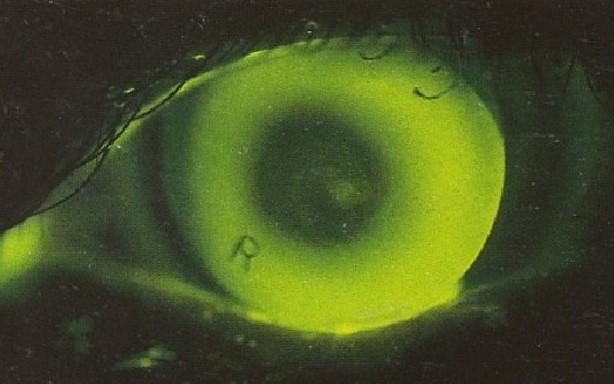 | back 2 Flat Fit
|
front 3 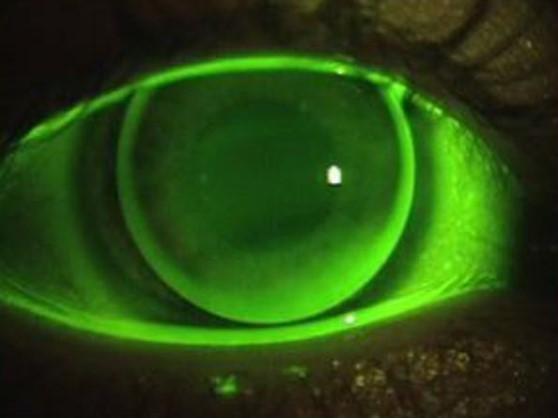 | back 3 Ideal Fit
|
front 4 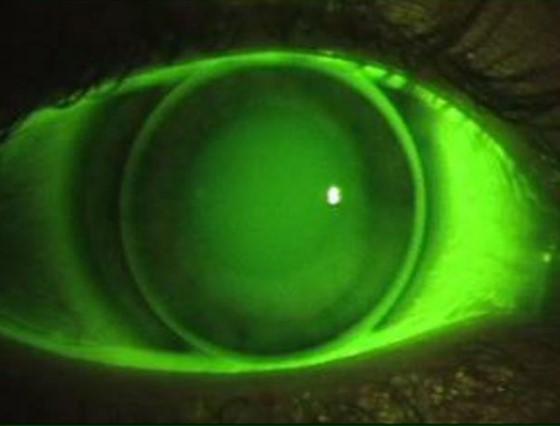 | back 4 Steep Fit
|
front 5 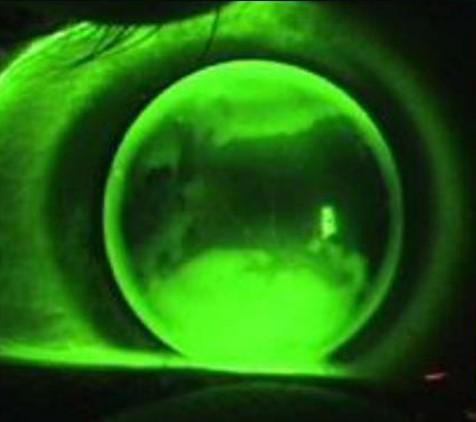 | back 5 With The Rule Astigmatism
|
front 6 Against the Rule Astigmatism | back 6
|
front 7 Flat Fit | back 7
|
front 8 Ideal Fit | back 8
|
front 9 Steep Fit | back 9
|
front 10 With The Rule Astigmatism | back 10
|
front 11 Lens fitting philosophies | back 11 interpalpebral fit → lens sits between the lids and is
well-centered |
front 12 Interpalpebral Fitting | back 12 An interpalpebral lens-to-cornea fitting relationship often refers to a lens that centers well and is positioned between the lids. It is often achieved with a slightly smaller overall diameter and steeper base curve radius than a lid attachment design. - work best with wider apertures |
front 13 Lid Attachment Fitting | back 13 The lens design includes an edge contour that sloped toward the lid to enhance lid-lens contact, often resulting in a slightly superiorly decentered fitting relationship. - lid doesn't feel the lens with each blink because it slightly overlaps the lens -Lid attachment RGP fits should show a thin, even edge-to-edge layer
of fluorescein stained tear film that |