Instructions for Side by Side Printing
- Print the notecards
- Fold each page in half along the solid vertical line
- Cut out the notecards by cutting along each horizontal dotted line
- Optional: Glue, tape or staple the ends of each notecard together
Exercise 3 The Microscope
front 1  | back 1  |
front 2  | back 2  |
front 3 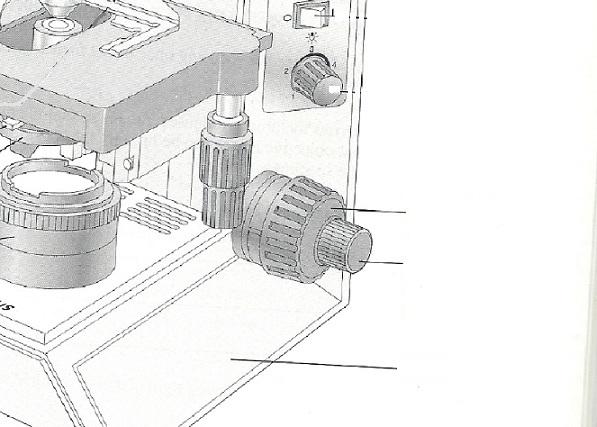 | back 3 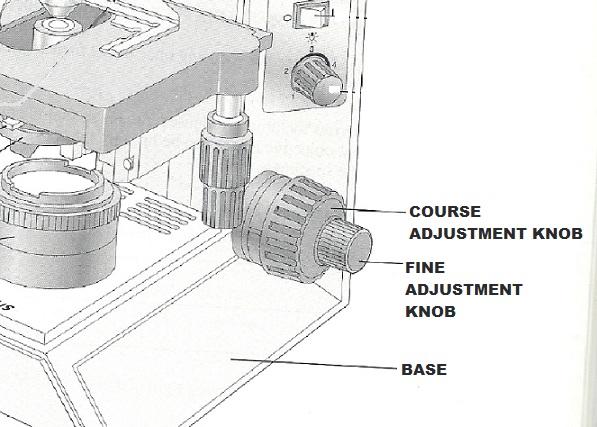 |
front 4 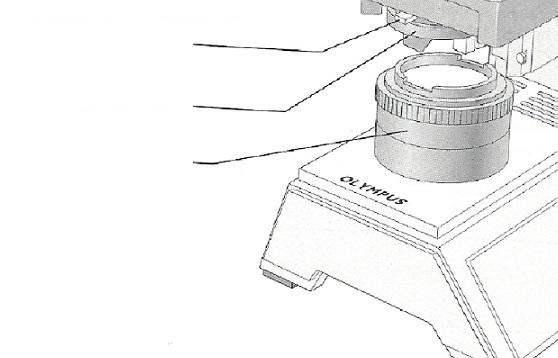 | back 4 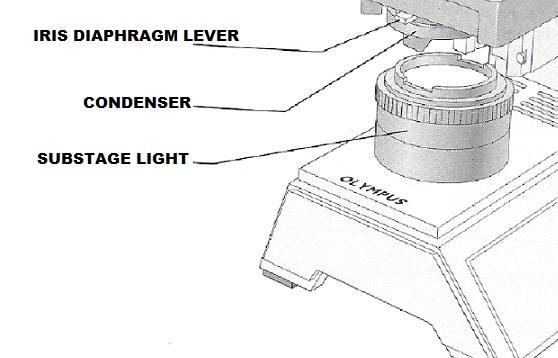 |
front 5 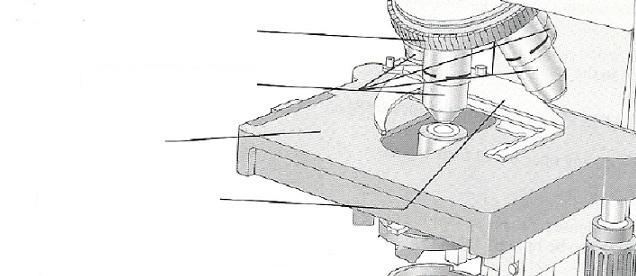 | back 5 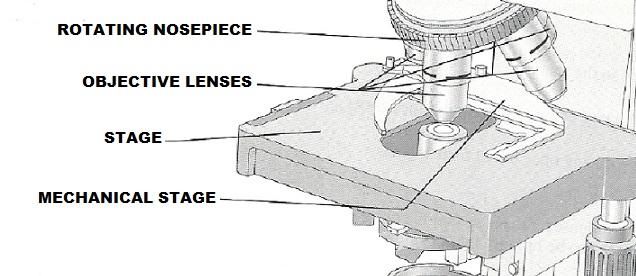 |
front 6 Explain the proper technique for transporting the microscope. | back 6 Hold it in an upright position with one hand on its arm and the other supporting its base. |
front 7 The microscope lens may be cleaned with _______. | back 7 grit-free lens paper |
front 8 The microscope should be stored with the _______ lens in position over the stage. | back 8 lowest-power objective |
front 9 When beginning to focus, use the _______ lens. | back 9 lowest-power |
front 10 When focusing, always focus _______ the specimen. | back 10 away from |
front 11 A coverslip should always be used with _______. | back 11 wet mounts |
front 12 Platform on which the slide rests for viewing | back 12 Stage |
front 13 Used to increase the amount of light passing through the specimen | back 13 Iris diaphragm |
front 14 Secure(s) the slide to the stage | back 14 Mechanical stage or spring clips |
front 15 Delivers a concentrated beam of light to the specimen | back 15 Condenser |
front 16 Used for precise focusing once initial focusing had been done | back 16 Fine adjustment knob |
front 17 Carries the objective lens; rotates so that the different objective lenses can be brought into position over the specimen | back 17 Nosepiece |
front 18 Virtual image | back 18 The real image that is magnified by the ocular lens to produce the virtual image seen by your eye. |
front 19 Resolution | back 19 The ability to discriminate two close objects as separate. |
front 20 The distance from the bottom of the objective lens to the specimen is called the | back 20 working distance |
front 21 Assume there is an object on the left side of the field that you want to bring to the center (that is, toward the apparent right). In what direction would you move your slide? | back 21 to the right |
front 22 The area of the specimen seen when looking through the microscope is the | back 22 field |
front 23 If a microscope has a 10x ocular and the total magnification at a particular time is 950x, the objective lens in use at the time is _______x. | back 23 95 |
front 24 Why should the light be dimmed when looking at living (nearly transparent) cells? | back 24 increase contrast |
front 25 If, after focusing in low power, only the fine adjustment need be used to focus the specimen at the higher powers, the microscope is said to be _______. | back 25 parfocal |
front 26 Is, when using a 10x ocular and a 15x objective, the field size is 1.5mm, the approximate field size with a 30x objective is ____ mm. | back 26 0.75mm |
front 27 If the size of the high-power field is 1.2mm, an object occupies approximately third of that field has an estimated diameter of ____ mm. | back 27 0.4mm |
front 28 You have been asked to prepare a slide with the letter k on it. Draw the k as seen in the low-power field. | back 28 k (upside down) |
front 29 5 mm | back 29 50x |
front 30 Say you are observing an object in the low-power field. When you
switch to high power, it is no longer in your field of view. | back 30 The field decreases proportionately as magnification increases.
Therefore, unless the object is |
front 31 What should be done initially to prevent this from happening? | back 31 Center the object that you wish to view. |
front 32 Increase or decrease as one moves to higher magnifications with the
microscope? | back 32 1. increases (to a point) |
front 33 A student has the high-dry lens in position and appears to be intently observing the specimen. The instructor, noting a working distance of about 1 cm, knows the student isn't actually seeing the specimen. How so? | back 33 The working distance for the h.p. lens is closer to 1 mm |
front 34 Describe the proper procedure for preparing a wet mount. | back 34 Place the specimen on the slide with a medicine dropper or place a drop of water or saline on the slide. Mix specimen into drop using a toothpick. If staining, add a drop of stain and mix with a toothpick. Hold a coverslip with forceps so that the coverslip touches one side of the specimen drop, and then slowly and carefully lower the angled coverslip onto the specimen. |
front 35 Indicate the probable cause of the following situations arising
during use of a microscope. | back 35 A. The lens is not correctly rotated into place. |